Side Kick - Injury Prevention - Hip Control Drill
Side Kick - Injury Prevention - Hip Control Drill
Welcome to "Side Kick Drills" series. During the next couple of months, I'm going to share with you various Side Kick Drills that I've discovered, practiced, and perfected over the last four decades of my own martial arts training. I'm sharing these drills in response to inquiries I've received after posting the side kick analysis where I analyzed different types of side kick positions. You can take a look at these analysis by clicking here.
The drills I'm about to share with you will cover many bases. Some drills are for speed, some for power, some for height, some for form, some for control, some for the flexibility of the kicking leg, supporting leg, the core and so on.
I will explain each drill to you in detail. You will get a clear explanation of what each drill is used for, how it is used, how it can benefit you, what part of the body it works and so on. When working with a person one on one I usually select very specific drills for them. Some of the drills I'm sharing with I have discovered way before ElasticSteel Method of Athletic Conditioning has been established and before I've put together the ESKMS. Other drills are newer and have been developed in recent years. So again, over the next few months I will be sharing various Side Kick Drills with you which are NOT structured.
You will get lots of benefits from each drill, so if you haven't already done so, I suggest that you subscribe to my newsletter, so you can be notified right away when the next drill is posted. Once you sign up you will also get a FREE E-book on how to improve your Side Kick height!
Side Kick - Injury Prevention - Hip Control Drill
The focus of this drill is on the muscles of the kicking leg that hold up the leg in the short ranges, which is very important for control and power of the kick. Not so much for the height of the kick. Although speed and focus and other qualities of the kick also benefit from this drill. But this is not an isolated, specific drill for a specific quality.
This Side Kick - Injury Prevention - Hip Control Drill is more of a general drill for multiple qualities of the kick. So the goal of this drill is to isolate the Abductors, Gluteus Medius, Gluteus Minimums, parts of Tensor Fasciae Latae, and parts of Gluteus Maximus.
A lot of kickers don't have good control here. And to compensate for lack of control and awareness in these muscle groups, they lift the leg up quickly and injure the hip joint.
A lot of kickers don't have good control here. And to compensate for lack of control and awareness in these muscle groups, they lift the leg up quickly and injure the hip joint.
Here's a step by step of the Side Kick - Injury Prevention - Hip Control Drill
So, lets talk about how actually do this drill.

Step 1
- To begin, take a good sturdy chair.
- Hold on to the chair for support
- Lift the chamber slowly.
The reason that it's important to hold onto the chair is to take the focus off your core. By supporting yourself with the arm, your core relaxes and the muscles of the kicking leg activate.

Step 2
- From here extend the chamber into a low kick
- Once you extend the kick, place the open ridge of your hand (the area
between your index finger and your thumb) right above your abductors on the iliac bone.
The reason you want your hand on the iliac bone is to feel if your pelvis is moving. You need to keep your pelvis from moving and this trick will help you to feel if your pelvis is steady. All you want is your hip joint to move. And when you move your hip joint, you will feel the muscles right below your hand contract. And these are the muscles that you are working on in this drill.

Step 3
- From here, slowly bring your straight leg up higher.
- The range of motion here is very small
The goal is not to lift your leg as high as possible. Again, the range of motion here is very small, so you're not going to bring the leg high. And that's normal
because the height comes from the position of the pelvis, not so much from the
position of the kick in the hip. And you're not looking for height here in this
specific drill.
So once again, once the leg is extended, you want to place your hand in the right position so that you could feel the pelvis stabilize. Only the hip joint is moving and the right muscles are contracted.

Step 4
- Once you bring the leg up in that position, place your hand on your iliotibial band on the outside of your thigh.
- Push down with your fingers and let the leg press back up at you.

The muscles that are going to be strengthened in this Side Kick Injury Prevention - Hip Control Drill are:
- Gluteus Medius
- Gluteus Minimums
- Gluteus Maximus
- Tensor Fasciae Latae
There are four muscles that work in this Drill. Gluteus Medius, Gluteus Minimus, upper part of Gluteus Maximus and Tensor Fasciae Latae. None of these muscles are accustomed to contract in short ranges as required for the sidekick. And for this reason, these muscles will try to contract in their normal range, if they're not properly trained for the sidekick.
These muscles are strongest in the standing position. So when you have not trained to use these muscles in a side kick range, there will be an attempt to contract them in their strongest range, which is swing the leg up uncontrollably causing injury to the hip joint, because there is lack of control and awareness.
The purpose of this drill, is to develop strength in short ranges of the aforementioned muscles. For example a short range for your bicep would be when your hand is very close to your shoulder. Just like the High Torso Side Kick Drill which also works on the short ranges of the muscles.
To get maximum value out of this drill it is important to do it correctly!
It is important to do this drill properly to get maximum benefits out of it. To do so: Extend the leg down and bring it up with control. Your hand here acts as a scanner helping you to feel if your pelvis has stabilized, allowing only the hip joint to move. Press down. You can start with only 5 to 10 second holds. But eventually, you can build that up to 20 to 30 seconds.
In the beginning do not do more than two or three repetitions back to back. Take a break and stretch the muscles mentioned. The Gluteus Medius, Gluteus Maximus Upper Part, Gluteus Minimus and Tensor Fasciae Latae. You can use Zaichik Stretching Techniques to isolate these muscles. You can also alternatively shake the legs out, but it's not as effective as stretching the muscles in between sets.
Remember when you contracted the muscles in short range? Again, you can try this with your bicep. Bring your hand as close as possible to your shoulder and try to resist that in that range. For a few seconds you will feel muscle spasms. We do not want to have muscle spasms, and for that reason we want to take breaks, relax the muscle and open it again.
If you are an absolute beginner to the drill, you will do it one repetition at a time for five or 10 seconds. In my experience, some people in the beginning cannot even hold it for 5 seconds, which shows you how weak these muscles are in short ranges.
And if you cannot hold your leg up as is shown in this drill, it will be very difficult to do a side kick properly. By doing properly I mean without injuring either the muscle, the joint, doing the proper technique and having any speed, power or control in the sidekick.
Over the next few months, I will share many different drills with you. Keep in mind though, that they won’t be structured. For optimum results flexibility needs to come before control, and control before speed, speed before power and so on.
It is not like the ElasticSteel Kick Mastery System where every drill is structured. I'm just giving you separate drills, but each drill, just like this one, will help you and with each drill I will explain to you exactly what it will help you with.
So again, if you haven’t already done so I suggest subscribing to my newsletter to stay informed. When you sign up you will also get a free E-Book on how to improve your Side Kick Height!

Important recommendations for this Side Kick Injury Prevention - Hip Control Drill
I recommend starting this drill with a warmup, such as leg raises lying down, or by doing basic kicking techniques.
I recommend performing this drill 2 to 3 times a week, no more than that. And in a few weeks you will begin to see and feel how your side kick is getting better. You should feel your leg get lighter, and that you now have more control over your sidekick. After performing this drill your side kick should become less of a swing.
And although there are some sidekicks that are performed as a swing, this technique is different than trying to swing the leg up because the muscles have no strength in short ranges. So these two should not be confused.
If you're interested in a step by step thorough side kick program you can take a look at the ESKMS. If you're interested in specific quality of a specific kick such as power of a front kick or height of a sidekick or speed of a roundhouse and so on, take a look at the All Kick Master Series programs below. Stay tuned for more drills!
To help you in perfecting your Side Kick we have a full collection dedicated specially to Side Kick training.
ELASTICSTEEL MASTER KICKER COLLECTION
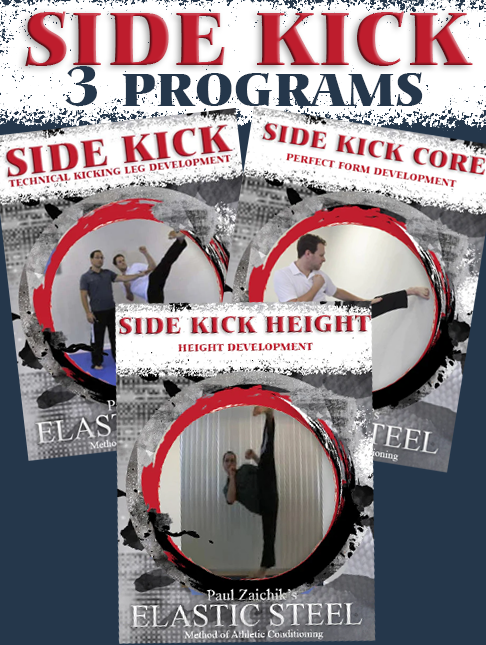
3 Program
Side Kick Combo
Side Kick Combo
This combo includes:
- Technical Kicking Leg Development
- Core Flexibility & Strength Development
- Height Development
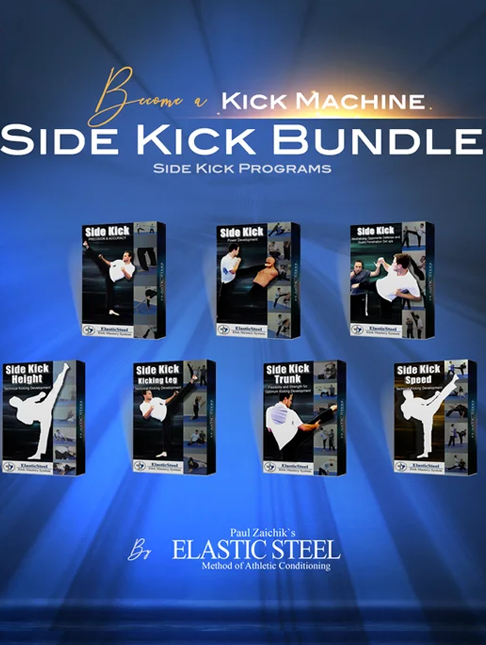
7 Program
Side Kick Combo
Side Kick Combo
This combo includes:
- Technical Kicking Leg Development
- Core Flexibility & Strength Development
- Height Development
- Speed Development
- Precision & Accuracy Development
- Power Development
- Flying Side Kick
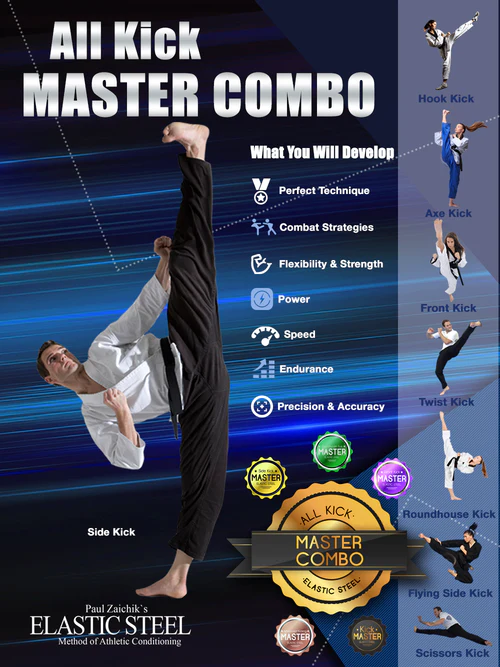
20 Program
All Kick Master Combo
+ 5 Gifts!
All Kick Master Combo
+ 5 Gifts!
This combo includes:
Side Kick:
- Technical Kicking Leg Development
- Core Flexibility & Strength Development
- Height Development
- Speed Development
- Precision & Accuracy Development
- Power Development
- Neutralizing Opponents Defense and Guard Penetration Set Ups
Roundhouse and Hook Kicks:
- Roundhouse Kick: Technical Kicking Leg Development
- Roundhouse Kick: Speed Development
- Roundhouse Kick: Power Development
- Hook Kick: Power Development
Front Kick:
- Front Kick and Front Line Kicks: Technical Kicking Leg Development
- Front Kick: Speed Development
- Push Front Kick: Power Development
- Axe Kick: Power Development
- Ball of the Foot: Point of Impact
Advanced Kicks:
- Scorpion Kick: Perfect form Development
- Flying Side Kick: Technique and Jumping Height Development
- Flying Split Scissors Kick, Two Direction Kick
- Twist Kick Technical Kicking Leg Development
- Twist Kick Follow Along Routine
+ 5 GIFTS!
Leave a comment